I’ve been using a sewing machine for a few decades now, and over the years I’ve picked up lots of techniques, hints and tricks. However, I still love to learn new things, and so last week I jumped at the chance to attend a workshop with a renowned expert in the field of embroidery, Sue Rangeley.

Detail of my workshop piece
Sue Rangeley teaches and writes about specialist embroidery techniques, including the process of stitching on soluble fabrics, rouleaux, free machining and the use of sheer fabrics. The day was particularly interesting for me because I regularly use many of the same approaches that Sue uses but with distinctly different results.

Sue demonstrating
Sue began with a one hour talk, covering her inspirations and the development of her ideas, and then discussed examples of her own work, showing the techniques we would be using in the workshop. Everyone taking this workshop was already a highly skilled machinist, which enabled Sue to concentrate on her specialisms.

Sue demonstrating the “rouleaux” technique

I was strongly struck by Sue’s highly methodical research into techniques, as I have a tendency to throw things together and see what happens. Her carefully accumulated knowledge of different organzas and other sheer fabrics gave me a lot of new ideas and fresh perspectives.

Sue shows her method of free machining on organza
I spent much of the workshop working on a test piece using free embroidery on soluble media. Although I was familiar with the technique, working with someone who has such highly-developed skills in this area was really informative.

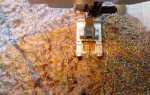
My test piece on soluble fabric

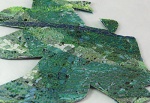
The test piece after dissolving the base fabric

Some of the pieces produced by the workshop participants
So, will I be integrating the things I learned at this workshop into my own work? I’ve got a couple of ideas that I intend to experiment with, but even though it may never be obvious, I believe that everything I learn goes on to influence the way I create.

Another test piece I made at the workshop
I had a really fantastic day!
Sue Rangeley’s book “Embroidered Originals” is available from Amazon and most bookshops.
You can find her at: http://www.suerangeley.co.uk
Signed copies of Sue’s book available from her website: www.suerangeley.co.uk , go to Publications page or email: sue.rangeley@btinternet.com for further details